How to Touch-Up Digital photos in
Adobe Photoshop CS2 the painless tenderfoot way:
This guide is intended to be used by persons who have VERY little knowledge of Photoshop and its complete capabilities and this is a nice launch pad to help improve home photos until said person learns the ins and outs.NOTE: This guide can work in versions below CS2 though 6 and below the menus could quite possibly look different.
If you’re reading this guide and are anything like me, you have a digital camera and love to take pictures, the only problem is, and sometimes digital cameras can take really disappointing pictures in poor quality lighting or conditions. So if you want to preserve memories well, it’s important to own a good photo editing software to go with any kind of digital camera.
Automatic and Painless Way:
Step 1) Find and open the photo you want touch up.
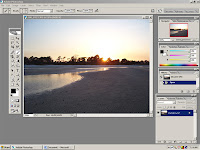
Step 2) Ok so you’ve managed to find the picture and open it, the menu’s seem scary, but bare with me. Just go to Image Tab and click on it and then go to adjustments,
for this guide’s purposes we are only going to use the auto features.
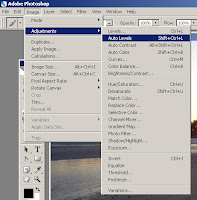
Step 3) Now on the sub menu adjustments let’s start with auto levels. Just click it and compare the two images. If it didn’t improve your picture, just go to edit step backward. And boom it’s back to normal.
Step 4) Now in the adjustments menu use Auto Color, you be the judge on the improvement made if any. And again just step backward if the image became less attractive.
Step 5) The last auto adjustment is auto contrast, this is normally only used is the photo came out way to bright or way too dark, so if you think the lighting is perfect move on if not just click auto contrast.
OOOK, so we’ve done all that, but something doesn’t seem quite armature photographer enough about it? Maybe you have too much “dead space in your picture.”
Let’s Crop it a little. Just remember with photos things are more appealing in a rule of three fashion. That means any item unless it is the
COMPLETE FOCUS of the shot, should not take up more then a 1/3 of the picture.
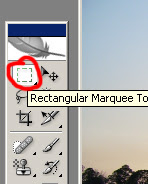
Step 6) To start things off click on the rectangular marquee tool on your tool bar.
Now this is important if you want prints make sure on the upper bar on style you have fixed aspect ratio picked. The ratio you should use is 4 x 6 or 6 x 4 depending on if you have a vertical or horizontal picture.

Ok so you’ve done that and will the rule of 3 in mind figure out what you want in the picture. I want the sun, because as you can see I have way to much width and sky. So use the marquee to mark the area you want.
With the selected area all highlighted with the dotted line head on up to the image menu and scroll down to crop and click it.
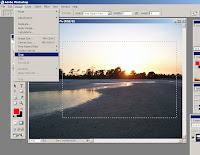
Alakazam and now you only have the selected area as the whole photo.
Now it’s time to save the file, but do make sure you click save as so you don’t over write the original.
ESPECIALLY if you cropped the image.
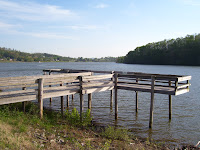
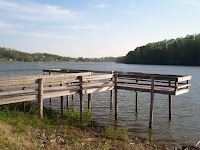
And here is a comparison of two of another image that took on a more noticeable difference with the auto-correction better than the one I happened choose to screen cap for the tutorial: